Pages

I love it all: embroidery, canvaswork, quilting, crochet. So much to do, so little time.


Showing posts with label Patchwork Pumpkin. Show all posts

Monday, October 28, 2013

Late IHSW Post: La Calabaza!

Hey Blog Buddies,

This is my latest IHSW post ever!  International Hermit and Stitch Weekend was a week ago!  I've been quiet the past two weeks because I've been working away on Debbie Stiehler's Autumn Pumpkin Patch.  (Calabaza is Spanish for "pumpkin.")  My original plan was to stitch half of a football-shaped section, but when I got to the halfway point I decided to go ahead and finish the rest of the section...

 
So now I have two footballs instead of one:
 
They're just like two peas in a pod.
 
From now on, I'll probably stick with the
original plan of stitching just
half a football at a time.
I was really burnt out at the end
from laying all of the 4-, 5- and 6-ply floss
which is called for in the various sections.
But I wanted to move this long-neglected project along,
and I made significant progress.
 
 
Here are a couple of the sections deconstructed.
This is the top left section on the left football above,
to give you an idea of the scale of the project:
 
The first step here was to lay the metallic ribbon in a grid.
You'll notice that it covers a good portion of the canvas.
 
The next step is stitching a double upright cross
using (at least) 4-ply of DMC.
We are covering up all that pretty ribbon!
 
(Sorry for the blurry photo!)
There are more upright crosses
in an Anchor floss that's an almost-identical orange.
You may be able to see some tiny
areas of white canvas still peeking through.
The ribbon is really hiding now!
 
Can you tell the difference in the oranges?
I can't, either in the photo above or in real life.
The last step is to cover the tiny bare areas
with regular cross stitches in lime green.
It gives the finished section sort of a tufted look.
And the ribbon underneath does add some shine.
Not all of the sections had four steps,
but all had two or more.
 
 
(Now you know why this took so long...)
 
Here is one of the plaid designs:
 
First step:  back stitch on the diagonal.
 
Next, fill in the same color pattern
with basketweave stitch,
and you can see the plaid start to take shape.
It's almost a no-brainer.
 
This week I'll be stitching on Part 2
of my Winter Logs SAL.
It will be a soothing break because it is all
Caron Watercolours with a couple of
#16 Kreinik braids thrown in--NO laying!
 
That's it from here.
Hope you had a good weekend,
and thanks for visiting!

Monday, August 12, 2013

The Pumpkin and Friends

Hey Blog Buddies,

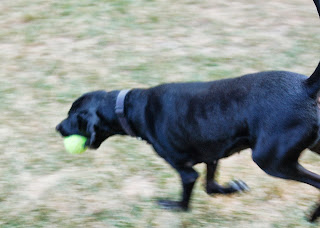
How was your weekend?  Did you get to do some fun summer (or winter) activities?  We had really nice weather here, so we biked, sat out on the deck and played with Molly in the yard.

She's a fast runner, and
my panning skills are lacking.
 
One can always get a better shot
just before throwing the ball!
 
And since I'm a little behind in showing you my stitchy stuff, let's not waste another minute.  I worked on the pumpkin (Debbie Stiehler's design--you can see the finished model on my sidebar), and I finished my first football!  Here is where we last left it:

Not the greatest picture, but you get the idea.
 
And here is what it looks like now:
 
You can see why I called it a "football."
There are 16 sections to each football.
They all repeat, but the stitches are placed
a little differently on each one.
 
Here is more detail of the finished sections:
That was a lot of stitching!
 
Here are some close-ups:
 
The darker section is an eggplant-colored
metallic ribbon couched with orange,
then diagonally backstitched with alternating
light and medium shades of green.  Fun!
 
Debbie gives great instructions
for stitching plaid designs easily.
The bottom right design is one of the layered stitches.
There is never a dull moment here.
 
I'll save other close-ups for later progress reports,
because I can see this might get
a little repetitive.
 
The first "friend of the pumpkin"
is a quilted table topper.
 
I pieced the top months ago,
and it's been sitting on the dining room table
in an unfinished state ever since.
I thought leaving it there would shame me into
finishing it a lot faster than I did--obviously not!
Yay, for a long-awaited finish!
 
The final "friends" of the pumpkin are two crocheted bunnies
which I made to sell at my guild's annual holiday boutique.
I was originally going to make just one bunny,
but you know how rabbits are--they multiply!
 
Here's my first bunny:
 
See how forlorn he is all by himself.
He looks like he's been run over by a truck.
 
I had an extra skein of yarn left, so...
...now he has a sister.
DH has named them Donnie and Marie.
(No, he's not quite right, either.)
You'll notice that the tips of Donnie's ears are rounded,
but Marie's ears come to a point
as per the instructions--but it was ugly getting there.
I used Cascade Cherub DK yarn,
and I found it somewhat difficult to work with
because it tended to split quite a bit.
The pattern is from Simply Crochet,
a British publication.
I learned the hard way that a British double crochet
is an American single crochet!
 
I guess Donnie gave Marie a tour of the backyard.
They probably climbed the tree
trying to get away from Molly.
Don't worry--I rescued them.
 
I have a third (and last) bunny in the works,
but he will look a bit different--
perhaps a third cousin twice removed.
 
That's it from here.
Thanks, as always, for visiting.
 

Monday, July 22, 2013

July IHSW

Hey Blog Buddies,

Hope you all had a groovy July weekend.  Well, another IHSW (International Hermit and Stitch Weekend) has come and gone.  I didn't get that much stitching in Friday through Sunday for various reasons, but I "cheated" and made up for it this morning.  However, I'm sure that Joyce at Random Ramblings will forgive me.  (heheh)

First up is the ornament for the
Halloween 2013 SAL.
This month's theme was bats/spiders,
so I chose Sweetheart Tree's
Itty Bitty Kitty - Halloween design.
The design is very small, and it's a good thing
because there were quite a few
quarter stitches and backstitching.
You'll notice it's not ornamentified yet.
I was definitely not in the mood to do that,
but it needs to get done before I start
the August ornament.
 
Then I decided to dust off my canvaswork pumpkin--
it's been on hiatus since shortly after the workshop.
 
Here is another case of the photo
not even coming close to doing the piece justice.
It's hard to make out the sparkly orange Treasure Braid,
the olive green Burmilana wool
and the burgundy Petite Very Velvet threads,
but they're there, and this little section
looks fantastic in real life.
It's right at the tip of the middle "football."
There are five adjoining football shapes which,
when finish-finished, will make up
a 3-dimensional pumpkin.
I'll be working on this piece all week,
so stay tuned for a more detailed update on the whole thing.
 
That's it for now.
Click on over to Random Ramblings to see
what the other hermitters were up to this weekend.
Thanks for organizing this, Joyce!
 
And thank you for visiting
and leaving your kind comments!

Monday, May 6, 2013

Patchwork Pumpkin Workshop

Hey Blog Buddies,
Did you guys enjoy the first weekend in May?  We had great weather here, but I spent the better part of the weekend indoors, since I had the good fortune to be able to attend a workshop led by Debbie Stiehler, a talented canvaswork designer.  Fourteen of us were stitching her Patchwork Pumpkin.  She has two versions--this is the one I chose to stitch:

This is the "autumn" version.
Isn't it just the cutest thing you've ever seen?
I've had my eye on this piece for at least two years
(more about that later).
 
Here is her Halloween version:
 
This is simply adorable, too.
I chose the autumn pumpkin because
I didn't want it to be too holiday specific.
 
Here's my progress after two days:
 
There will be four other football-shaped pieces,
each with 16 different "patches" to be stitched.
The canvas size is 24" x 14", so it's another BAP!
 
Here's a close-up of the two patches that are completed...
 
...along with some others that aren't.
That's the nature of workshops:  you hop around a lot!
 
I discovered this piece a couple of years ago,
and lusted after it immediately.
It was being offered at an ANG seminar in Texas--
too far for me to go, and a little too expensive to get there.
Last year it was being taught in Green Bay, WI--doable!
But the class was full by the time I registered.  (sigh)
This year my local chapter had Debbie scheduled
to teach another one of her pieces right here in Chicago,
but it was changed at the last minute to the pumpkin!  Woo-hoo!
This was my first workshop with Debbie:
she's a great teacher, very funny and down-to-earth.
Unfortunately, it will be my last one
since she announced that she won't be doing
any more traveling after this year.   :(
But I'm really happy that I finally got the opportunity
to do this piece before she retires!
I will squeeze it into my rotation somehow!
 
Hope you all had a fun, stitchy weekend.
Thanks, as always, for visiting!